My Favorite Sewing Tips for Beginners (and Reminders for Lazy People Like Me)

I am not a well-learned seamstress, nor am I always a patient one. As much as I appreciate true skill and art of sewing, I (admittedly) tend to skip steps and “cut corners.” So, here are some of my favorite sewing tips, many of which I need to remember to do myself! 

  1. pins-1358849_1920.jpgZig-zig the edges of your fabric and prewash it. I confess I’m guilty of skipping this step. A lot. However, if you really want something to turn out well, do it. You don’t want to find out (surprise) that your perfectly finished garment has shrunk or bled in the wash later on. And DO put a zig-zag on the edge of fabrics you know might fray when washed. Trust me; otherwise you will have loose frayed strands wrapping around everything else in the wash, ligature-style.
  2. Use rocks to hold your paper patterns flat. Pinning the pattern to your fabric is a pain and sometimes you will want to minimize the amount of pins you stick in delicate fabrics. So, keep the pattern in place by placing medium-sized rocks at the corners while you trace out the pattern onto the fabric.
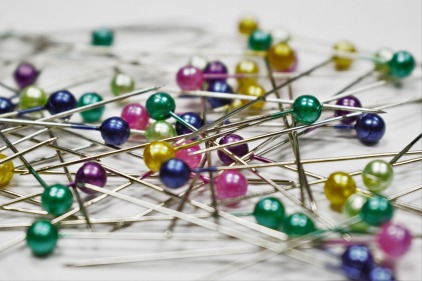
  3. Use a million pins. Pin everything in place to the nth degree, especially when working with knit and stretchy fabrics. This is probably a good tip no matter if you are an expert or not, but for those of us who aren’t enormously adept at guiding the fabric through the machine just right, having everything practically stapled in place with pins is essential. Trust me, I know the temptation to skip the pins and dive right into sewing. I’ve been there. But I’m telling you, fight down that impulse and pin it.
  4. Keep magnets handy to pick up or store pins. Pin cushions are great, but there’s something to be said for having a magic talisman that makes every pin it encounters stick to it immediately. Avoid dropped and mislaid pins by using magnets instead of (or in addition to) pincushions.
  5. Sew “manually” with the hand crank in tough spots. This might be  dirt obvious to most sew-people, but I honestly didn’t figure it out until I was trying to sew a topstitch halfway pretty. Don’t push the foot pedal, and use the hand dial on the side of the machine instead to manually “walk” the needle and thread around tricky curves.
  6. MY Rule of Thumb for cutting elastic is half the length it is supposed to stretch along. In other words, measure the whole distance this elastic is supposed to run along. (So if you are putting an elastic waitband in, you will measure around the waist.) Take that figure and divide it by 1/2. There’s your elastic length. Or at least that’s what I usually do. Naturally, I adjust the length if I think the elastic should be tighter or more loosesew-1345477_1920 (1).jpg
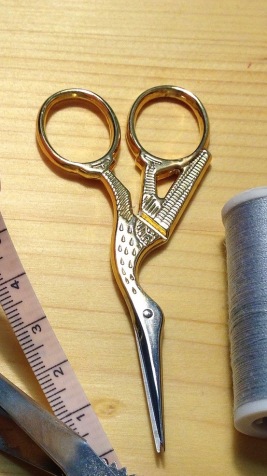
  7. Invest in nice sharp fabric scissors AND some of those tiny, narrow-nosed scissors for close encounters with threads. Yes, any old pair of scissors will do in a pinch, especially if you take the time to sharpen them nicely. But there is nothing so sacred or useful as a pair of sewing shears meant only for that purpose. Cutting things properly and easily makes the rest of the project go so much better, with a better result. And it’s always good to know that there is at least one good pair of scissors in in the house! As for the “tiny scissors” these make trimming loose threads and delicate areas so much easier–definitely worth the investment of a few dollars if you will be sewing with any frequency.
  8. Use a test scrap in your machine. Always test out stitches on a scrap piece of fabric first, especially if you have just messed with the stitch settings on the machine. If the tension needs to be adjusted, better to screw up on a scrap than on your actual project!
  9. Take a crash course in sewing machine tension. You always know if the thread tension is off on my machine because of the high pitched screaming that ensues when clumps of thread start appearing on my precious project. Here’s thread tension in a nutshell:
    • If the stitches are too loose on the “top” of the fabric you are sewing, the tension of the top thread (the one coming from the spool) is too tight and is pulling the stitches on the “bottom” through. The cure for this is to lower the tension on the spool thread, i.e. set the tension dial to a lower number.
    • Conversely, if there are loose stitches occurring on the “bottom” of the fabric, that means the tension of top thread is too loose. Increase the thread tension, i.e. set it to a higher number.
    • That’s basically it. I usually end up messing with the setting, sewing stitches on my scrap cloth until I’m happy with it
  10. Check that your machine is threaded properly constantly! When your thread falls off one of the main loop-de-loos or hooks (whatever) bad things happen. So, try to keep on top of it. And if your stitches suddenly started misbehaving, that is the first thing you should check. Maybe the thread has wrapped around the thread stand and gotten stuck. Rethread the whole thing if you aren’t sure.
  11. Use a safety pin to pull drawstrings or elastic through the casing. This is probably a pretty well-known one, but worth mentioning. Attach a safety pin to the end of the elastic/string, then bunch the fabric and guide the safety pin through until it comes out the other end. Make sure you attach the safety pin by folding the end of the elastic or string over once and inserting the pin through both layers of the fold. Otherwise, the end could unravel, the safety pin will come loose, and you will have to start all over again
  12. Keep a lint roller next to your sewing station to catch all your snipped threads and lint. All the little snips and bits that accumulate while I’m sewing drive me nuts, so call this the neat freak tip. I like to keep a small lint roller next to me and use it to quickly clean everything off. It’s fast and easy and everything stays put until I’m ready to throw it in the trash. If you aren’t into using a lint roller (not wanting to generate the extra waste) then just have a designated spot or container on your table to catch your thread waste. I really feel a clean station and a thread free project will actually help you focus and improve the final results.


“A stitch in time saves nine.”

                            –Ben Franklin, printer

How to Prepare the “Perfect” Wedding Flower Girl 

Come forth, fairy gowns and flower crowns. A little girl has been asked to be a flower girl at a wedding…and you are in charge!

Yay. Both fairies and little girls are notoriously full of mischief and moods. There’s no question they’re cute, but getting a wee one to do the following is a feat of almost mythical proportions:

  1. Walk down a straight path to music
  2. Throw some petals on the floor
  3. While continuing to wear what they were dressed in

So here is some friendly advice borne out from experience. Ivy has been asked to be in two weddings before she was 3-years-old to the delighted mania of I, her mother. It was definitely a lot of fun! I even made the dress she wore (you can find the original sewing pattern here). No, everything did not go perfectly because weddings, like most events, never do. (You’ll notice that the word “perfect” in this post’s title is in ironic quotation marks.) But, she did very well and helped make the occasion a lovely one.


MY 10 TIPS

  1. Choose a Simple, Comfortable and Practical Look

Ideally, you want a dress and accessories you can toss on and a hairdo that can be done in a few minutes. This is a kid we’re talking about. It needs to be comfortable so your flower girl is happy. It needs to be simple enough that it still looks straight after she rolls around on the floor—and/or it is easy to readjust. Ivy’s dress was designed with this in mind, hence it was simple and stretchy. Cumbersome looks that take a lot of preparation are an impractical choice. Pick something that both holds up and is easy to quickly fix or redo.

  1. Don’t Forget Yourself

This isn’t just a self-affirming exercise. You are going to end up in a lot of pictures next to your coifed and charismatic child, so have some fun with your hair and clothes too. Since you are still on kid-wrangling duty, use the same advice as when choosing the flower girl’s dress and hairdo, and make sure it’s relatively foolproof and practical as well as elegant.

  1. Flower Girl Training

I had Ivy watch videos of other flower girls marching down the aisle in order to get the idea in advance. Do not wait until the dress rehearsal to teach the flower girl her duties. We practiced at home for a few minutes here and there over a few days and I tried to build it up as a fun activity where one gets to dress up in a “princess dress” and throw things on the ground.

  1. Dress Rehearsal

You should also have her wear the dress at home a few times and do a test run of hair and accessories. If there are issues it is better that they happen at home first. If she refuses to wear that flower crown or thinks the lace is scratchy on her dress, better to know now and alter plans accordingly.

  1. Get Your “Kit” Together

Keeping things in one place and as rummage free as possible on the big day is essential. I preferred to keep my own dress and things separate from the flower girl gear in order to avoid a jumble. So, I’d suggest tidily packing in a single bag or case (Along with the typical diapers, extra clothes, sweaters, etc.):

  • The complete flower girl uniform (including stockings, shoes, etc)
  • A small pouch of hair accessories (pins, clips, brushes and combs)
  • Toys and amusements (like books, dolls, puppets)
  • Snacks and hydration
  • Baby wipes
  • Needle and thread (for repairs)
  • Stain remover (oh the horror)
  1. Don’t Be Too Early

Time your arrival so that you are safely on time, BUT not so safe that you are waiting around forever. You don’t want to get into a “hurry up and wait” situation with a progressively cranky toddler dressed to the nines. Again, bring toys and books.

  1. Dress Close to the Ceremony

Dress yourself first, and I’d suggest waiting until it is really getting close to the ceremony before you put your girl’s outfit on. We want to minimize the chances that she’s going to get fed up before the wedding even happens OR some mishap befalls her dress.

  1. Consider Escorting

It just wasn’t feasible for Ivy to walk down the aisle by herself and still stay on track, so I actually walked with her during her flower girl duties. This took a lot of stress out of the process because I knew that an adult would be there to make sure she kept moving and encourage her to scatter her flowers. If you have a shy, clingy, or sporadic kid, this is a very good option that will make everyone’s life easier.

  1. Pre-Aisle Emergency Items

These are some items I wish I had stashed next to us just before she walked down the aisle. It is by no means an exhaustive list. Keep them handy and toss them in a bush or under a chair afterwards if you have to.

  • Hairbrush and comb (for obvious reasons)
  • Hairpins or alligator clips (for errant hairs)
  • Baby wipes or washcloth (for any dirt or stickiness)
  • Water (especially if it’s outdoors and warm)
  • A mirror (to check how I looked too)
  1. Roll With Trouble

Accept that it won’t be a breeze and don’t get upset about it. Trust me, frustration and anger will ruin the moment much more than any other mishap or funky thing your child chooses to do. Keep it light. If the flower girl refuses to budge and has to be carried at the end of the line like a sack of potatoes, OR if she has a meltdown right before walking down the aisle (not that I’d know about that…), it will just add spice to the occasion! Ah spice. Spice is good, right?


Good luck!


GET THE SEWING PATTERN FOR IVY’S DRESS HERE

IMG_7375_Fotor

All the Toys I Brought On Our Cross-Country Trip Fit Into One Little Baby Backpack

Ivy and I just got back home from a month long trip across the country to visit her Nana (Grandma on daddy’s side) in Virginia. I had never been to the East Coast, and it really was breathtaking to be in a completely different part of the country. Nana treated us like princesses, and I miss the lush Virginian forests and dramatic Blue Ridge Mountains already.

This experience came at the price of thousands of miles by plane and hundreds of miles by car, as we toured the countryside. Ivy is an excellent little traveler, but she gets bored like any toddler sitting in one spot for hours.

IVY’S LITTLE KNAPSACK OF TINY TOYS

I brought along a single little baby backpack full of small toys, all very light and compact. I learned from our last big trip that you don’t need to take lots of bulky, heavy toys to keep your child amused. (They usually end up tossing them aside anyway! So why struggle?!!) A handful of small figurines, cars, little activities, and miniature books will keep them just as occupied. I kept everything organized with little plastic baggies. It was easy as pie.

IMG_8452

CONTENTS:

  • A bag of finger puppets
  • 4 toy cars
  • a few colorfully shaped rubber erasers
  • An assortment of plastic animals that fit into a sandwich bag
  • One larger plastic horse and red rubber alligator
  • A toy police bike
  • 3 mini books
  • A pack of easy-peel stickers (not pictured)
  • One stuffed horse (pictured below)

Were these the only toys I packed? Well, for the most part, yes. To be on the safe side I did keep a few other tricks up my sleeve, such as some larger books tucked into her diaper bag, some paper and crayons, and one or two smaller gadgets to keep her amused. (Nana’s pocket tape measure is a good example of one of these extra “toys”–thanks Nana!)

Honestly, the biggest toy you can pack is yourself really. This humble collection of playthings was more than enough to keep Ivy smiling, especially with mom there to play them with her. If I were to simply toss her these toys, she was done with them in about ten seconds…but if I were to play with her (either with or without the toys), she was engaged for a great deal longer.

ivydecorsmaller
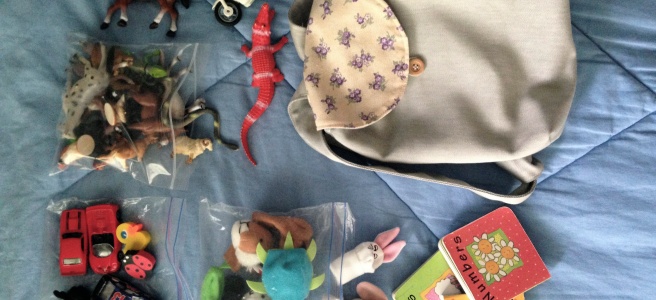
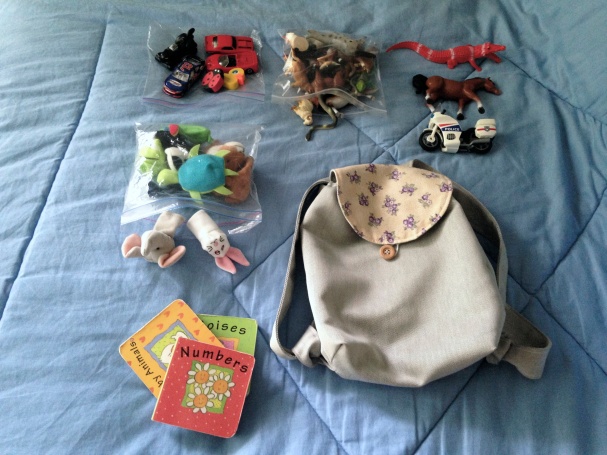
All in all, traveling with a baby was actually fun. When the toys ran out, I pointed the sights out to her as I saw them and we enjoyed seeing and doing new things together. The neat thing about traveling with young children is that it makes you see things from their point of view a little bit more because, in unfamiliar territory, it’s a new world to you too.

Happy Trails!

IMG_8462.jpg

Child Labor Can Be Good: How I Redirected My Toddler’s Trash Can Habit Into Her First Chore

It was so simple. I managed to redirect my child’s negative behavior into actually helping mommy. One little baby raising victory, and I’m suddenly giddy! Here’s what happened.

Once Ivy learned how to walk, I started having a problem with her throwing things in the trash can…like my clean laundry, for example. Ew. Thank you, child. In fact, it has kind of become our go-to spot to look when random things are missing. “Did you look in the trash?” “What if Ivy tossed it in with the garbage that we just took out?” Etc.

At first I just tried to give a very firm “no” whenever she made for the garbage and she either tried to throw something in or tried to dig around to pull something out. I’d quickly pull her away for a serious talk. “No, Ivy! Do not do that. You don’t throw those in the trash.” I always put out good solid statements like that because, you know, all babies listen. Right. You know what she’d do? She’d laugh. She’d look up at me with a humongous smile and laugh. She’s reeeeeaal scared of mommy. Sigh.

Continue reading